Moneydance is a personal financial software was initially released in 1997 and developed by The Infinite Kind. It can run with Windows, Mac and
1. Download transactions online from several banks
2. Bill payments
3. Budgeting and Reports
4. Multi-Currency
5. Investment tracking and much more
Even you can track your information with a mobile application available in both Android and iOS
Information: They also do offer a free trial and 90 days money back policy.
If you’re a Moneydance user and planning to transfer your information to Quicken. You can do it easily there is no hurdle to face but you may need to remember a couple of things before transferring Quicken.
Unfortunately, you can’t transfer all of your data from Moneydance to Quicken like you can’t transfer reminder into Quicken
Things to remember before transferring Moneydance to Quicken
You can export your Moneydance data and import it into Quicken only with a cash account and you can’t import your brokerage/401(k) accounts data either because QIF format isn’t available with Checking, Savings, and Credit card accounts in Quicken.
This method is useful if you’re tracking your account manually in Moneydance and would like to do the same in Quicken. Ensure about the below information before converting Moneydance data into Quicken
1.Reconcile all your accounts
2. Remove duplicate payees
3. Account name should be less than 40 characters (limit in Quicken)
4. Cancel recurring payments if available
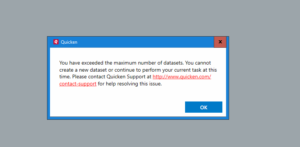
Quick Note: If you’re not sure about the transfer process, please contact Quicken Support.
Simple Steps to Transfer Moneydance to Quicken via QIF format (Import/Export)
Export Moneydance Data
1.Open Moneydance
2. Click on File > Export
3. On the next window follow the instruction (see an image below)
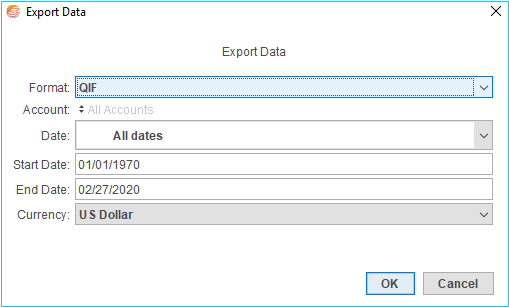
4. Once you’re done with Export Data process Click OK
5. Now you export the file successfully
Import Moneydance data into Quicken
As you exported your file from Moneydance now it’s time to import it into Quicken. We would like to suggest you please create a new Quicken file. Follow the instructions below
1.Open Quicken
2. Go to File > New Quicken File…
3. Choose New Quicken File and click on OK
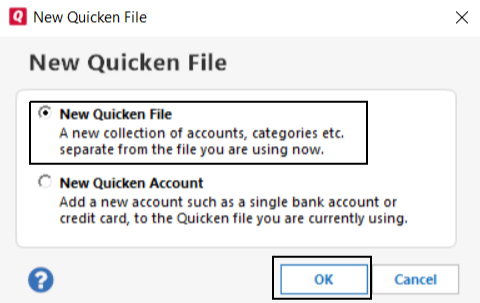
4. Give a name to your new Quicken file and click Save
5. Quicken prompt you to login to your Quicken ID and password
6. Once you enter your login click on Sign In
7. Now follow on-screen instructions
8. As you’re into your new Quicken file
9. Go to Tools > Add Account…
10. Choose Cash
11. Give a name to your account and click on Next
12. On the screen give an opening date and balance and click Next
13. Then click Finish
14. Now go to File > Import > QIF File…
15. Next screen prompts you to browse your QIF file that you exported from Moneydance
16. Choose an account that you created
17. Choose your option under include in import and click Import
18. Now the import process has been completed
Things to do after importing Moneydance file to Quicken
You’re almost ready to go after importing data from Moneydance to Quicken but you need to do under the following steps to ensure every information is correct.
A. Check your payees, categories
To check payee details
1. Go to Tools > Memorized Payee List
2. Click on a payee that you want to change
3. Click Edit
4. Now you can apply the changes that you want and then click on OK
To check Categories details
1. Go to Tools > Category List
2. Choose a category that you want to have some changes and right click on it
3. Click on Edit
4. Once changes applied then click on Save
B. Check Reports and Budgeting
To check Reports
1. Go to the Reports section
2. Choose a type of report like Banking, Comparison etc.
You may face some other issues after importing like Opening balance may not be right, etc. but no need to be worry you can Contact Us and we’ll help you to make everything up and running for you. Call Tollfree 1-877-353-8076